
In this article we will show you how to create SQL Server SSL Certificate template and sending SSL Certificate Signing Request (CSR) from that template to CA server, also we will issue requested certificate and use it on SQL Server machine.
Step 1: Perquisites
For generating and installing SSL certificates you need to have a Certification Authority (CA) service in place to manage certificate requests, like “Microsoft CA Service” as described in Part 1 of this article series “A tutorial to Microsoft CA Service installation“.
Step 2: Create and Manage Windows SSL Certificate Templates
Your initial goal is to select or create a template with the necessary configuration to issue the kind of certificate that you want.
Start on a system with the Certification Authority Management Tools installed. If you run a GUI installation of Windows as your certificate server, you likely installed those tools along with the Certification Authority role. Otherwise, you will find it as an installable role in the standard Remote Server Administration Tools package.
- As a domain or enterprise administrator, open the Certification Authority tool under Windows Administrative Tools.
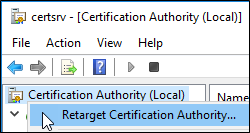
- If not running locally on the certification authority, right-click on Certification Authority and click Retarget Certification Authority. Connect to the target certificate authority.
![]()
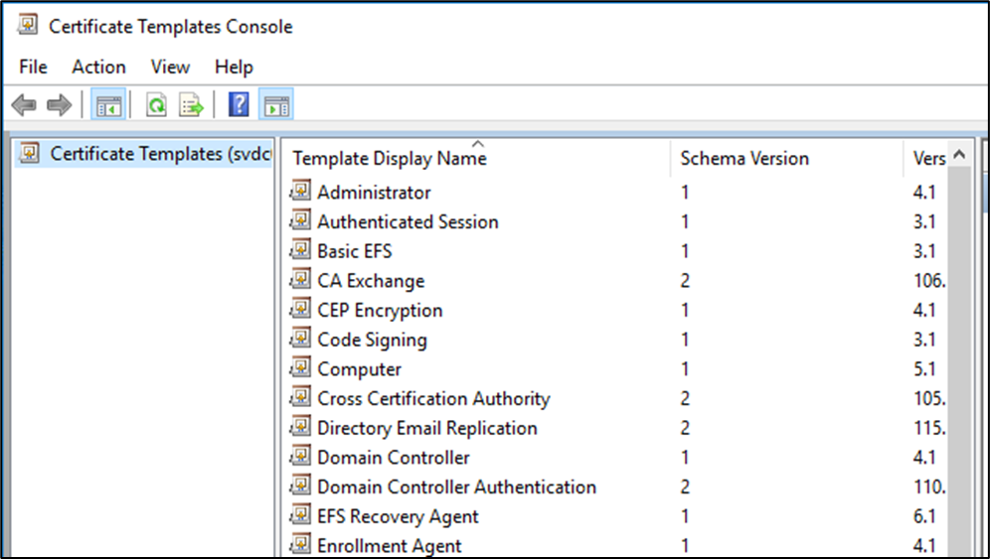
- Expand the tree in the left pane. Right-click Certificate Templates. Click Manage. That will open the Certificate Templates Console. (you can add this console directly to MMC; since you rarely work with templates separately from the authority, it makes sense to start there).
![]()
- In the Certificate Templates Console, right-click the “Computer” template and click Duplicate Template.
![]()
- That action will immediately open a set of property sheets to configure the newly-copied template. Start by switching to the General tab. Your Template display name will say Copy of Computer. Change it to something that suits you (Example: SQL Server). If desired, you may also change the validity period of the certificate from its default of 1 year (Example: 5 Year). I do not change Renewal period. It establishes a window prior to expiration in which autoenroll will renew. Since we’re using an Active Directory-integrated certification authority, select Publish certificate in Active Directory so you can make it available for enrollment.
![]()
- Switch to the Compatibility tab. The Show resulting changes checkbox will pop-up a dialog every time you change either of the compatibility settings. The Certification Authority setting governs which Windows Server versions running the Certification Authority role will be able to use all CA-related settings on the certificate template. The Certificate recipient setting does the same for systems that request a certificate from the CA. Note that the compatibility settings have no impact on the systems that will communicate with certified machines nor will they necessarily prevent a down-level system from having a certificate issued.
I set it to Windows Server 2016 for Certification Authority and Windows 10 / Windows Server 2016 for Certificate recipient, but it’s better to set these values to Windows Server 2003 and Windows XP / Server 2003 for situations that you don’t know organization app and servers platform versions.
![]()
- In request handling tab, set Purpose to Signature and encryption as required for SQL Server SSL certificate, also Check the Allow private key to be exported.
![]()
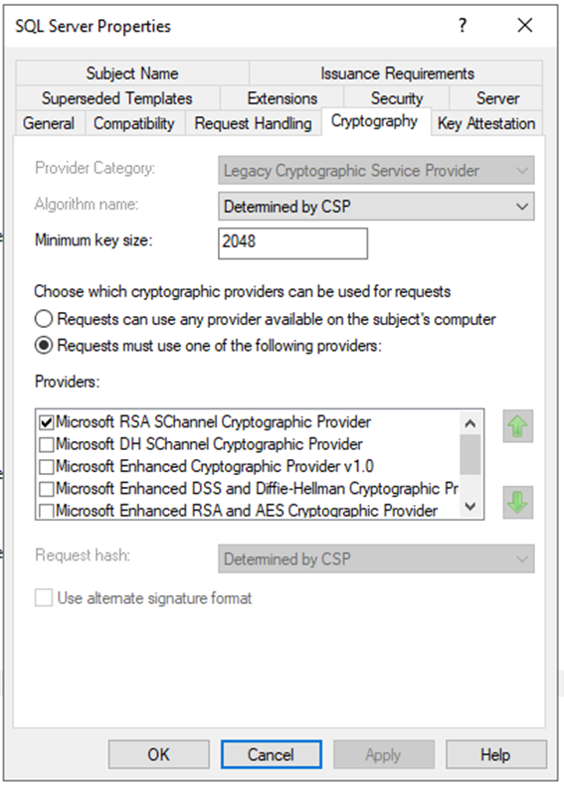
- In Cryptography tab set Minimum key size to 2048 and select Microsoft RSA SChannel Cryptographic Provider
![]()
- From Extensions tab select Key Usage attribute and Edit its config as below:
![]()
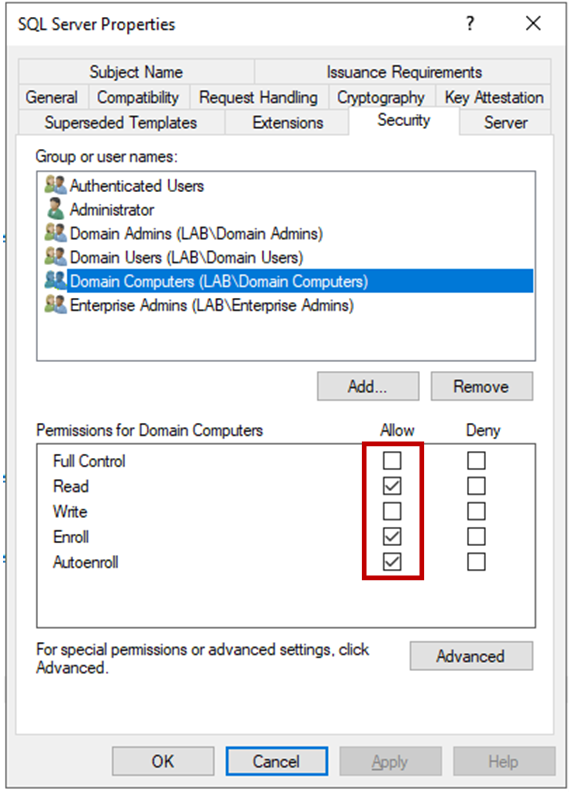
- Switch to the Security tab. I want to make this available to any computer in my domain, so I added that object to the ACL and granted it Read, Enroll and Autoenroll. If I wanted to let regular users enroll their computers, I could add matching security group(s) and grant them Enroll.
![]()
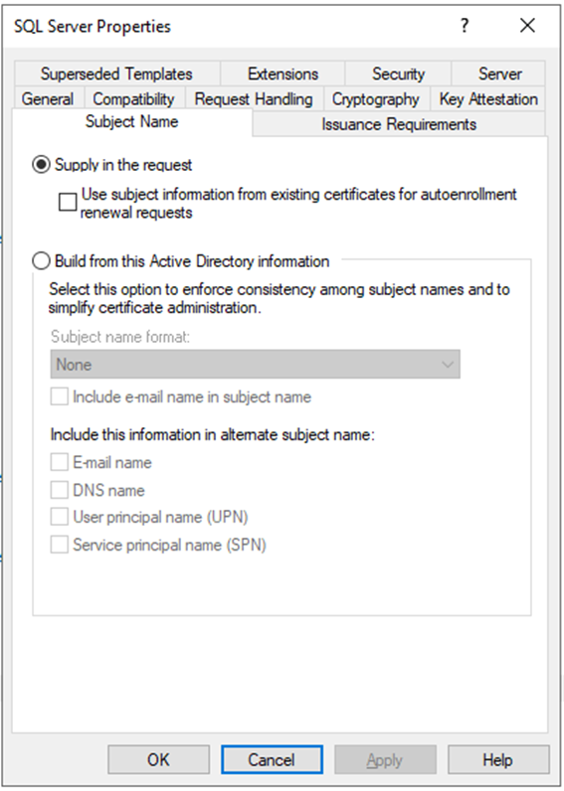
- Switch to the Subject Name tab. Because we’re making a certificate for manual enroll, I chose Supply in the request.
![]()
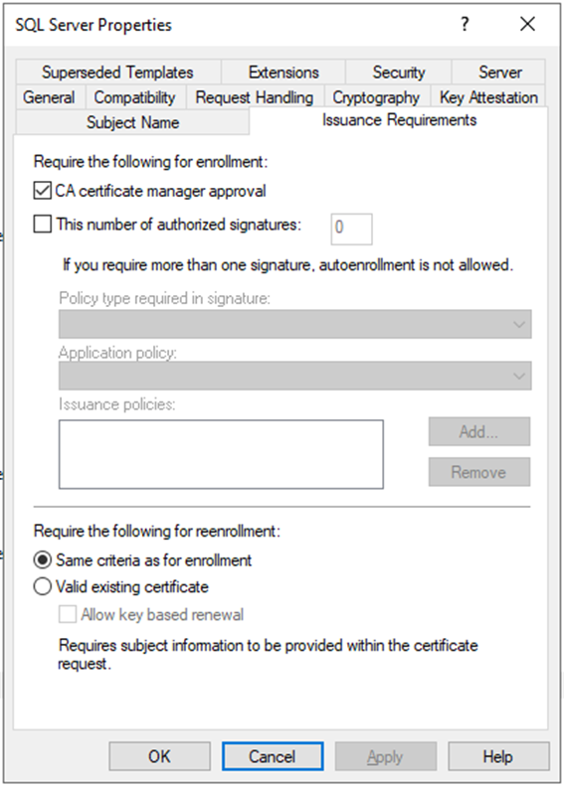
- Switch to the Issuance Requirements, because we want to SQL Server SSL requests approve manually by admin, we set enrollment method to CA certificate manager approval.
![]()
- Finally Apply and close properties windows. Once you have a template created, return to the Certification Authority MMC. Right-click the Certificate Templates node, hover over New, and click Certificate Template to Issue.
![]()
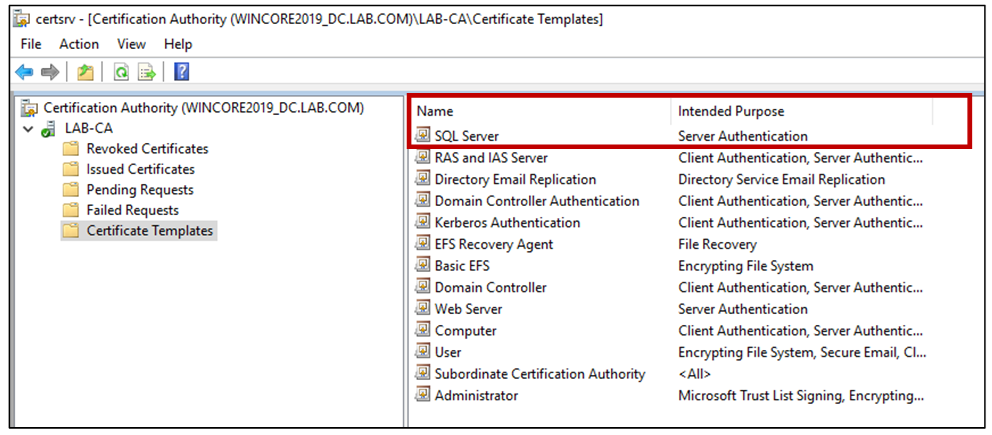
- Now you only need to select SQL Server (your newly created template).
- Finally, you should see your template as below
![]()


Step 3: Preparation of Group Policy Management
To exporting root CA:
- In the CA server, launch the Certificate Authority application by Start | Run | certsrv.msc.
- Right click the CA ROOT node and select Properties.
- On the General tab, click View Certificate button.
- On the Details tab, select Copy to File.
- Follow through the wizard, and select the DER Encoded binary X.509 (.cer) format.
- Click browse and specify a path and filename to save the certificate (Example: LAB-CA.cer).
- Click Next button and click Finish.
![]()

To manage trusted root certificates for a domain:
- Open Server Manager, and under Features Summary, click Add Features. Select the Group Policy Management check box, click Next, and then click Install.
- After the Installation Results page shows that the installation of the Group Policy Management Console (GPMC) was successful, click Close.
- Click Start, point to Administrative Tools, and then click Group Policy Management.
- In the console tree, double-click Group Policy Objects in the forest and domain containing the Default Domain Policy GPO that you want to edit.
- Right-click the Default Domain Policy GPO, and then click Edit.
- In the GPMC, go to Computer Configuration, Policies, Windows Settings, Security Settings, and then click Public Key Policies.
- Double-click Certificate Path Validation Settings, and then click the Stores tab.
- Select the Define these policy settings check box.
- Under Per user certificate stores, clear the Allow user trusted root CAs to be used to validate certificates and Allow users to trust peer trust certificates option in the Per User Certificate Stores check boxes.
- Under Root certificate stores, select the root CAs that the client computers can trust (In our scenario we select Third-Party CA and …), and then click OK to apply the new settings.
![]()

To Adding certificates to the Trusted Root Certification Authorities store for a domain:
- Domain Admins is the minimum group membership required to complete this procedure.
- To add certificates to the Trusted Root Certification Authorities store for a domain.
- Open Server Manager, and under Features Summary, click Add Features. Select the Group Policy Management check box, click Next, and then click Install.
- After the Installation Results page shows that the installation of the GPMC was successful, click Close.
- Click Start, point to Administrative Tools, and then click Group Policy Management.
- In the console tree, double-click Group Policy Objects in the forest and domain containing the Default Domain Policy GPO that you want to edit.
- Right-click the Default Domain Policy GPO, and then click Edit.
- In the GPMC, go to Computer Configuration, Policies, Windows Settings, Security Settings, and then click Public Key Policies.
- Right-click the Trusted Root Certification Authorities store.
- Click Import and follow the steps in the Certificate Import Wizard to import the certificates (You should import the .cer file that exported previously in “To exporting root CA” phase of Step 6. Example: LAB-CA.cer).
![]()

To Configuring the trusted publisher’s policy settings for a domain:
- Click Start, point to Administrative Tools, and click Server Manager.
- Under Features Summary, click Add Features. Select the Group Policy Management check box, click Next, and then click Install.
- After the Installation Results page shows that the installation of the Group Policy Management Console (GPMC) was successful, click Close.
- Click Start, point to Administrative Tools, and then click Group Policy Management.
- In the console tree, double-click Group Policy Objects in the forest and domain containing the Default Domain Policy Group Policy object (GPO) that you want to edit.
- Right-click the Default Domain Policy GPO, and then click Edit.
- In the console tree under Computer Configuration\Policies\Windows Settings\Security Settings, click Public Key Policies.
- Double-click Certificate Path Validation Settings, and then click the Trusted Publishers tab.
- Select the Define these policy settings check box, select the policy settings that you want to apply, and then click OK to apply the new settings.
![]()

Step 4: Create SSL Certificate Signing Request – CSR – and Install requested certificate on SQL Server machine
- Connect to SQL server machine
- Open command prompt as administrator and update group policy
C:\gpupdate /force
- Now Create an empty ANSI text file named CertUtil_Request.inf and paste below configs on it and replace your CN (SQL Server machine FQDN) with “WINCORE2019_E19.LAB.COM”, then save the file:
[Version] Signature="$Windows NT$" [NewRequest] Subject = "C=IR, O=SqlDeep, L=Tehran, ST=Tehran, CN=WINCORE2019_E19.LAB.COM" ; Exportable = TRUE ; Private key is not exportable HashAlgorithm = SHA256 ;Sha256, sha384, sha512, sha1, md5, md4, md2 KeyAlgorithm = RSA ;RSA, DH, DSA, ECDH_P256, ECDH_P521, ECDSA_P256, ECDSA_P384, ECDSA_P521 KeyLength = 2048 ; Common key sizes: 512, 1024, 2048, 4096, 8192, 16384 KeySpec = 1 ; AT_KEYEXCHANGE ; AT_NONE, AT_SIGNATURE, AT_KEYEXCHANGE KeyUsage = 0xA0 ; "CERT_DIGITAL_SIGNATURE_KEY_USAGE | CERT_KEY_ENCIPHERMENT_KEY_USAGE" is used for Digital Signature, Key Encipherment MachineKeySet = True ; The key belongs to the local computer account ProviderName = "Microsoft RSA SChannel Cryptographic Provider" ProviderType = 12 RequestType = CMC ;Also you can use PKCS10,PKCS7,CMC,Cert,SCEP SMIME = FALSE UseExistingKeySet = FALSE KeyProtection = NCRYPT_UI_FORCE_HIGH_PROTECTION_FLAG FriendlyName="SQL SSL Cert" UserProtected = FALSE PrivateKeyArchive = FALSE ;Used only for CMC [Strings] szOID_SUBJECT_ALT_NAME2 = "2.5.29.17" szOID_ENHANCED_KEY_USAGE = "2.5.29.37" szOID_PKIX_KP_SERVER_AUTH = "1.3.6.1.5.5.7.3.1" [Extensions] %szOID_SUBJECT_ALT_NAME2% = "{text}dns=wincore2019_e19.lab.com" %szOID_ENHANCED_KEY_USAGE% = "{text}%szOID_PKIX_KP_SERVER_AUTH%" [RequestAttributes] CertificateTemplate = "SQLServer" ;Get possible values via this command: certutil -CATemplates - Now open command prompt as administrator (DC admin is preferred) for Creating SSL Certificate Request according to configs specified in CertUtil_Request.inf file:
C:\CertReq –New CertUtil_Request.inf SSLCertRequest.req
![]()
- Verify the request with the following command:
C:\Certutil SSLCertRequest.req
![]()
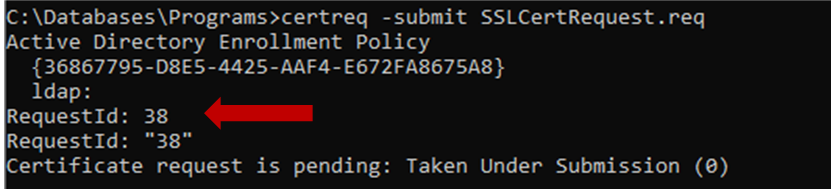
- Now you should Submitting the request (REQ file) to the CA
C:\CertReq –submit SSLCertRequest.req
**If the CA is reachable via RPC over the network, use the above command to submit the certificate request to the CA and You will get a selection dialog to select the CA from.
**If RPC traffic is not allowed between the computer where the certificate request was created and the CA, transfer the certificate request to the CA and perform the same above command locally at the CA Server.![]()
- Now connect (RDP) to CA server for Issue the certificate and Export it from CA server in .p7b format
– Open Windows Administrative Tools\Certificate Authority app and from Pending node in tree-view right click on your submitted Certificate Request (with Number showed in step 5 output)
– Then click on Issue
If you encountered “The revocation function was unable to check revocation because the revocation server was offline. 0x80092013 (-2146885613 CRYPT_E_REVOCATION_OFFLINE)” error after issuing the request and request was gone to Failed state, you can resolve this error by executing the below command on CA server and then re-issuing the failed request again:C:\certutil –setreg ca\CRLFlags +CRLF_REVCHECK_IGNORE_OFFLINE
– from Issued node in tree-view, open your issued certificate and from Detail tab click on Copy file …
Select .p7b file format and check “Include all certificates in the certification path if possible” and finally
– specify exporting file path (Example: SqlCert.p7b).
– File copy exported .p7b file (Example: SqlCert.p7b) to target SSL guest machine (SQL Server Machine).![]()
- Install a certificate (.p7b file) whose private key was generated with certreq. The –accept parameter links the previously generated private key with the issued certificate and removes the pending certificate request from the system where the certificate is requested (if there is a matching request).
C:\CertReq -accept C:\SqlCert.p7b
![]()
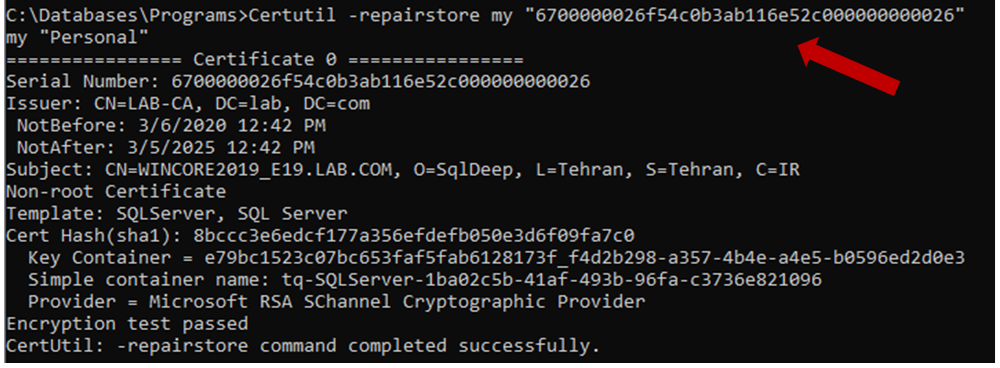
C:\Certutil -repairstore my "serial number"
**serial number was printed to the console as a result of CertReq -accept command
![]()


Step 5: Assign SSL Certificate to SQL Server
- Connect to SQL server machine
- Open imported certificate from Certificates snap-in and from Personal\Certificate path open your SSL certificate (with the name of your FQDN machine) and go to Detail tab and select Thumbprint property, then copy its value for future (or alternatively you can copy Thumbprint from item 7 of Step 7)
- Be sure your SQL Server service account has profile on your SQL Server Windows machine OS, for this purpose logon to SQL Server windows machine with SQL Server service account and then sign-out, finally logon as your regular account to the server.
- Be sure your SQL Server service account (or MSSQL$xxx group) has Full permission on Computer\HKEY_LOCAL_MACHINE\SOFTWARE\Microsoft\Microsoft SQL Server\MSSQLxx.yyyy\MSSQLServer\SuperSocketNetLib
- Now, you should grant permission on imported certificate private key to SQL Service account as below (run PowerShell as admin):
– Grab your cert UniqueKeyContainer (Replace Thumbprint with value copied from step 2):$Cert = Get-Item Cert:\LocalMachine\My\Thumbprint $Cert.PrivateKey.CspKeyContainerInfo.UniqueKeyContainerName
![]()
– In SQL Server guest machine, go to below path and grant “Read” permission on file named as above command output (UniqueKeyContainerName) to SQL Server Service account
C:\programdata\Microsoft\Crypto\RSA\MachineKeys\ UniqueKeyContainerName
![]()
- Open Computer\HKEY_LOCAL_MACHINE\SOFTWARE\Microsoft\Microsoft SQL Server\MSSQLxx.yyy\MSSQLServer\SuperSocketNetLib
- Change “Certificate” value to Thumbprint value copied from step 2. (also, you can change this value via SSCM\SQL Network Configuration, right-click on Properties of “Protocols” and from Certificate tab select your target SSL certificate)
- Change “ForceEncryption” value to 1, I would not recommend this unless you know 100% all of your applications support SQL SSL (also you can change this value via SSCM\SQL Network Configuration, right-click on Properties of “Protocols” and from Flags tab set Force Encryption to Yes)
![]()
- Finally restart your SQL Server service.
- Now you can test your secure connection by connecting to SQL Server instance and executing below query, “TRUE” value for encrypt_option column is indication of successfully SSL certificate implementation.
SELECT [encrypt_option] FROM sys.[dm_exec_connections] WHERE [session_id]=@@Spid
![]()


Database administration is an exciting job combining knowledge, art and experience; you must live with it to love it, despite all the difficulties.
Currently I'm working as a Microsoft SQL Server DBA and BI consultant.

I make SQL Server faster and more reliable. Database administration isn’t about passing a certified exam or about pointing and clicking your way through a crisis. Database administration is about applying the right solution at the right time, avoiding risk, and making robust choices that get you home each night in time for dinner with your family.
[…] How to issue SSL certificate and configure Microsoft SQL Server to use issued SSL… […]